Welcome to my Scrap Room!
This room used to be the dining room. But seriously. We don’t cook and we don’t entertain. A perfectly good, spacious room at the front of the house with lots of natural light and easily cleanable wood floors was going unused. So, I rescued it and turned it into the ultimate scrapbooker’s workshop!
Come take a tour with me!
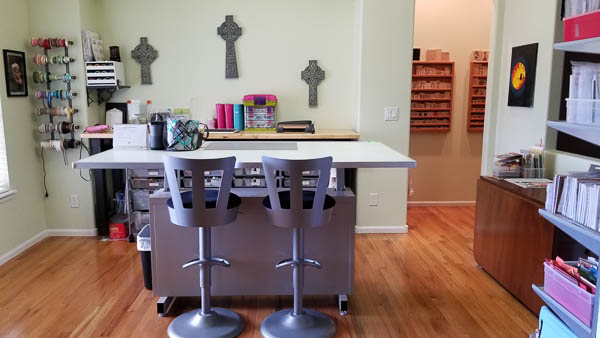
Here is what the room looks like when you first walk into the house. Two huge windows are on the left and an equally huge opening to the great room and basement stairs on the right. So, I have to be creative with storage because I don’t have many walls to go up!
Desk
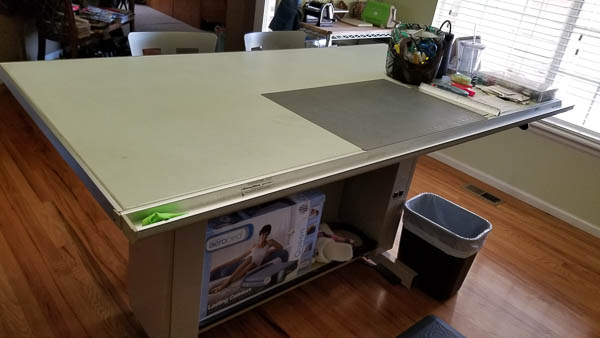
My desk is an old drafting table that engineers and architects used to use. It raises and lowers, has power and a pen tray and tilts. It is the BEST because I can stand at it, which saves a lot of time and energy because I don’t have to get out of a chair every time I need supplies from other parts of the room. (And standing burns more calories!) But if friends come over to scrap who don’t want to stand, the two bar stools work perfectly.
Plus, it’s easily cleanable and the little pen tray is great for putting my trash in, and at the end of the scrappy session, it all just slides into the trash can!
As you can see, I have an assortment of stuff to the right of my main workspace. This consists of my box of frequently used pens (red, brown, black, grey, white, silver and gold), rulers, adhesive, scrap paper, my shower caddy of tools and of course, my Scrap Gals cup.
You may be wondering why I have an Aerobed cardboard box below. It is actually cut out on the other side and it’s my spray station. I put it on the floor, line the inside with paper towels, and spray projects with spray mists or Color Burst in there. Nice and contained!
Workbench
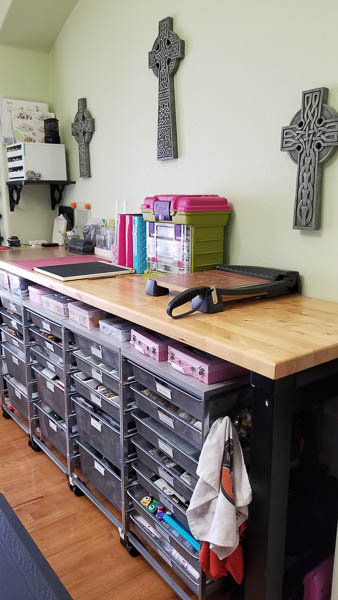
Right behind the table is the workbench. This is a huge bench made of steel and butcher block from Costco. It sits perfectly over my 4 elfa carts from The Container Store. The carts are the BEST storage because they are 14×14-inch drawers with backstops so they don’t go flying out, and the drawers come in three depths. I’ve had to only slightly reconfigure them over time.
This is where my ‘stations‘ are. On the far right is my cutting station with my trimmer and enough space next to it to stash 12×12 pieces of paper, ones that I’ve either cut or recently purchased and that need to be put away. Next to that is a caddy containing small embellishments like brads, buttons, bottle caps and other very random things I’ve acquired. In front of that goes a tray that is my ‘put away‘ tray. I throw new and just-used things in there that I put away all at once later on.
To the left of that is my scoring station, with my huge 12×12 ScorPal scoreboard. I make a lot of cards so having that out all the time, and in its own spot instead of on my work surface, is a dream. I cut the paper at the cutting station, slide over to the scoring station, then turn around with my cardbase to the work table.
Behind the ScorPal board are my Queen and Company Bling Books which are overstuffed with all my bling. It’s organized in those books according to the rainbow and without any of the packaging. Just slide the sheets of gems in and out of the pockets.
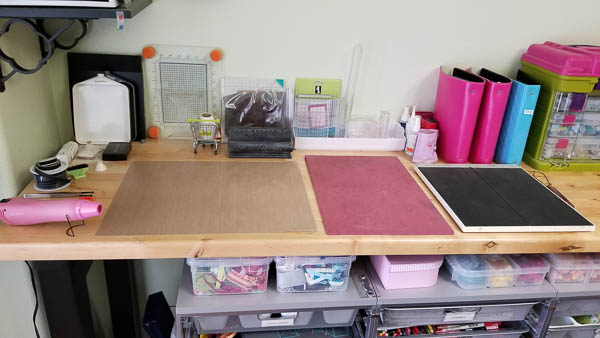
Here’s a better view of the scoring station, followed by the stamping station where I have a huge red mat to stamp on (gives a better impression than stamping on a flat surface), and behind that you will see bottles of stamp cleaners and a white tray that holds all my acrylic blocks.
The final station is my embossing and messy station. Here’s where I do my heat embossing as well as any smaller or more fine painting on the craft mat. You’ll see that I have everything set up: trays for the powder in the back left corner, my static bag and VersaMark ink, a brush to brush the powder back into the bottles, tweezers and my heat tool, which sits nice and close to an outlet to the left.
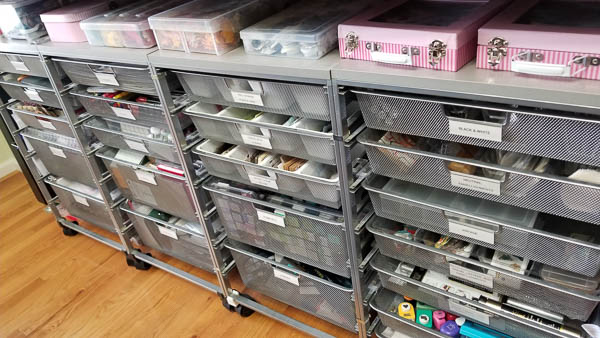
The containers in the horizontal gap between the elfa carts and the butcher block counter contain ribbon scraps, flowers and pens. I just pull the box I need, turn around to use it at my workspace, then swing back around to put it back. Quick and easy.
Drawers
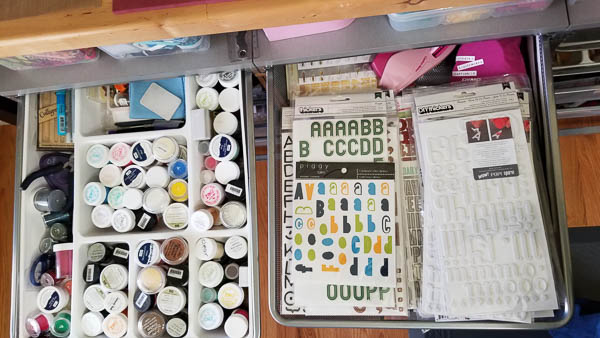
Now let’s look in each of the drawers! At the top left, embossing powders and extra tools are on the left. Alphabet stickers are on the right.
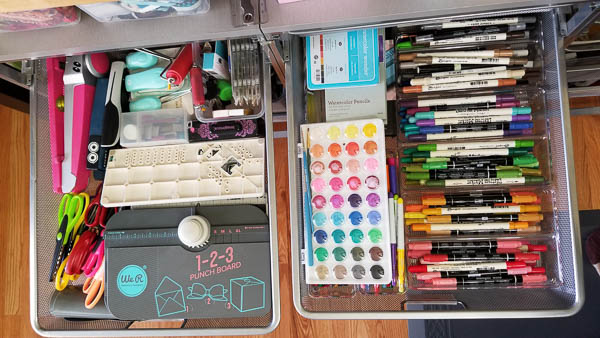
Next level down are tools I don’t frequently use — but could easily bring up to the workbench to use — and markers, watercolor paints, colored pencils and watercolor crayons. These are all stored in utensil/pen trays. They, too, are from The Container Store, so when I knew I was looking for storage like this, I brought some markers to the store with me, took one of their elfa drawers over to the kitchen aisle, and sat there figuring out a maximum configuration!
The third level down on the left has my floss, twine, string, pins and eyelets. Yes the random twine situation on the left is messy but it’s good enough because it’s not a deep drawer so I can dig through it very fast to find the right color, and it’s still contained in the smaller utensil tray.
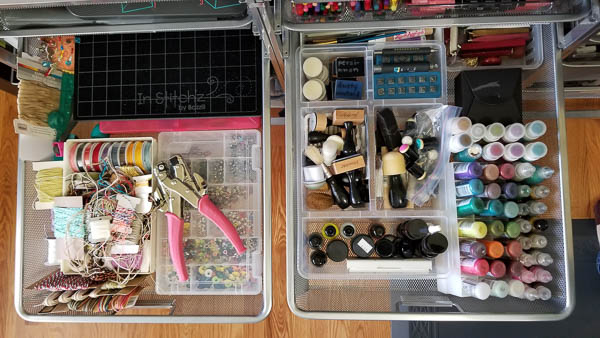
The right drawer holds more mixed media supplies like wax seals, daubers and texture brushes, splatters, paints and Stickles. These drawers are halfway down the carts, so we’re getting into harder-to-reach territory, and thus, less frequently used supplies.
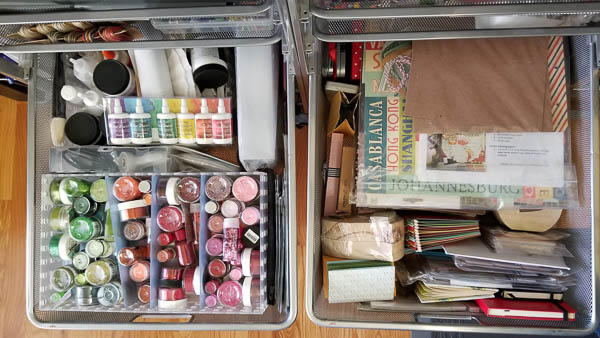
These next two drawers are much deeper. On the left we have glitter, embossing paste, a light box, stencils and extra bottles of glue that stand upright in such a deep space. The glitter is in trays that are stacked, so if I need a different color, I just lift the tray out. On the right are half-finished projects like mini albums that I don’t know what to do with. : \
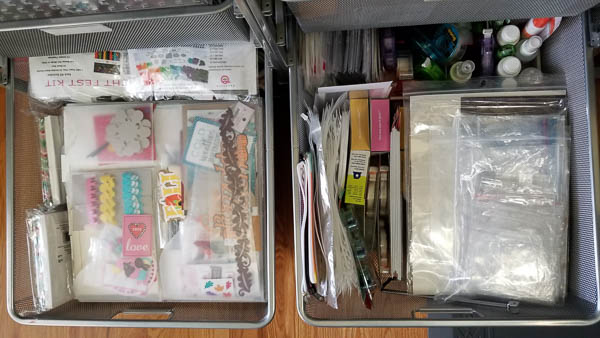
These last two drawers on the left are just as deep as the previous two and house holiday supplies (yes, I have just one drawer for all the holidays) and extra supplies like foam squares, adhesive, plastic bags, etc. These are at the bottom because I don’t access their contents often.
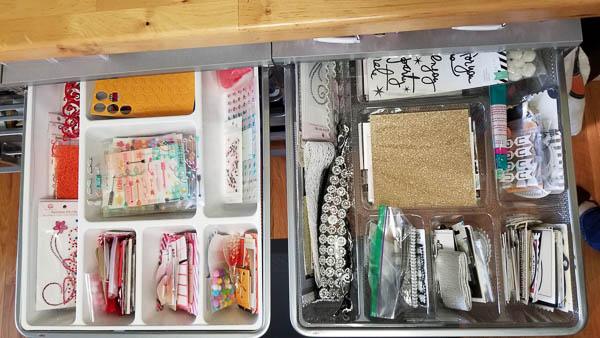
In the next two elfa carts, I have drawer liners that fit perfectly and house my small, generic embellishments that are organized by color. These are embellishments that don’t belong to specific collections, so I pull from these when making kits, cards and layouts. The left drawer is red, orange, pink and purple supplies and the right is neutral supplies like black, white, cream and kraft.
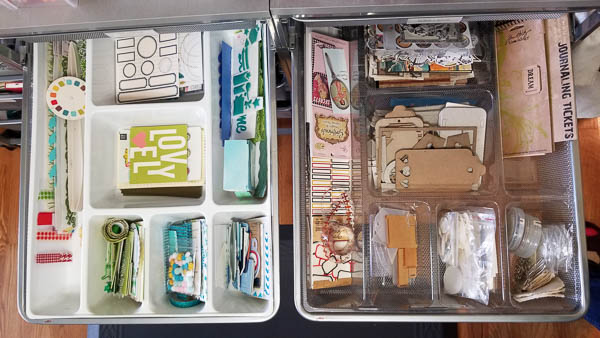
This left drawer contains green, teal and blue while right drawer contains clear, kraft and vintage, which I consider a separate category because I would never mix vintage-looking things with more modern ones on a project.
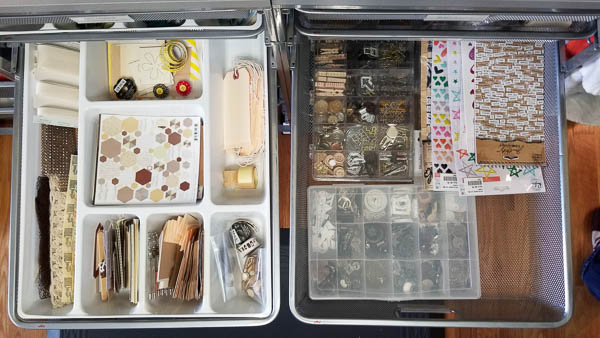
This left drawer contains yellow, brown and cream embellishments while the right drawer houses smaller, compartmentalized containers of metal and wood embellishments like metal charms, clothespins and paperclips. Assorted larger sets of embellishments are on the far right that won’t fit into those divider trays but are still part of my ‘generic’ embellishments.
Inks
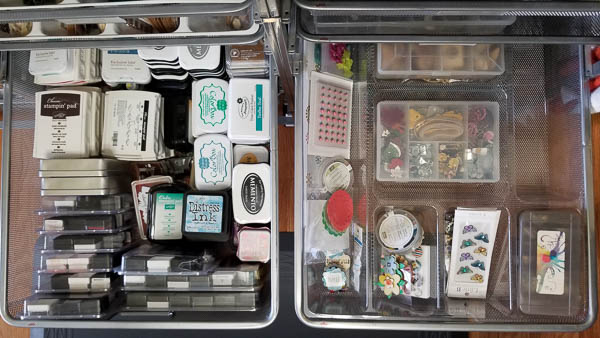
Beneath the shallow embellishment drawers is a deeper drawer on the left for all my inks. You’ll notice that full-sized ink pads lay flat, while I have the small one-inch cubes standing upright in a couple of Tim Holtz containers, but the rest are old Stampin’ Up clear containers from wood stamp sets! They work PERFECTLY for ink cubes, embellishments, washi tapes and for making embellishment kits to take with you to crops.
On the right, I have a bit of a hodgepodge drawer of themed embellishments. Again, they don’t belong to specific collections, but they are themed in terms of wood, animals, school, etc.
Punches
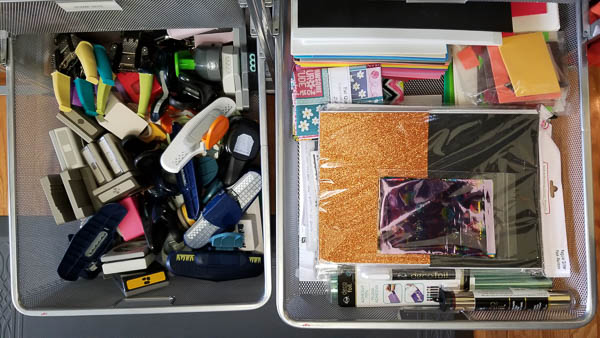
A super deep drawer is on the left, at the bottom of the cart, for my heavy punches. These drawers are super sturdy and I can’t tell you how often I’ve opened and closed that drawer and flung punches into it without scratching or denting a thing.
To the right are some ‘special’ mediums such as foam, fabric and my foiling supplies.
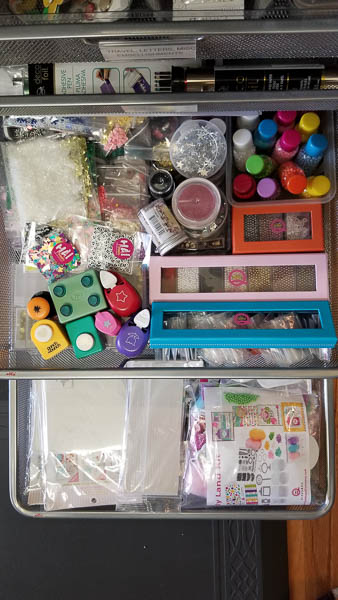
Last but not least, two more shallow drawers on the right balance out the three-deep punch drawer on the left, and house what I lovingly refer to as my ‘shaker sh!t‘. I’m a card-maker as well as a scrapbooker and I’m a sucker for shaker cards, so I have one drawer filled with bottles of shaker bits (beads, jewels, sequins, shapes, confetti, etc.) and the last drawer is shaker shapes, card fronts and other foam pieces. Yes, I am aware of having too much shaker sh!t.
Ribbon
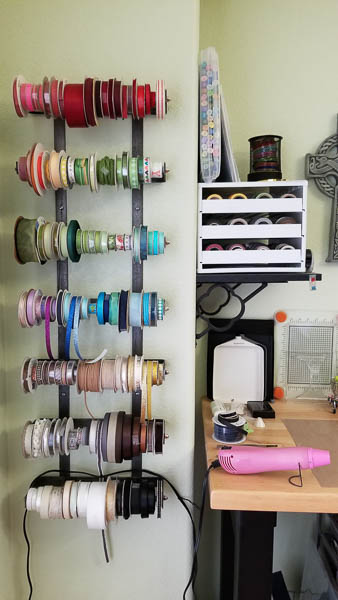
This is my glorious, homemade ribbon rack that sits to the left of the butcher block workbench. My husband made this for me from leftover steel his dad had in his garage. There are screw nuts on either side of each dowel, so I unscrew the nut closest to the ribbon I want, push in the dowel, and slide the ribbon off. That is, IF I need to remove the spool, which I only do if I want to take it to a crop — to use it at home, I just pull the ribbon and cut it with the scissors I keep next to the heat tool. Again, keep tools at the ready!
My scraps of ribbon, like when you buy just a yard of it, are in the two plastic shoeboxes beneath the embossing station.
To the right of the ribbon rack are my Copic markers, washi tape and wire in that black pen holder for the We R Memory Keepers Jig.
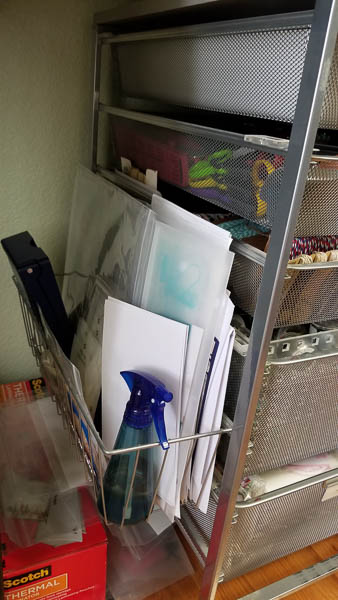
This is a slide-on basket that holds templates, a water mister and my old CM photo trimmer — again, stuff I don’t frequently use. You can also see my heat laminator on the floor in its box (I have no place for it!), along with a graveyard of ziplock bags from page kits or collections. I keep those to make new kits to take to crops, or to house a few sheet of papers and embellishments I’ll buy of a new collection.
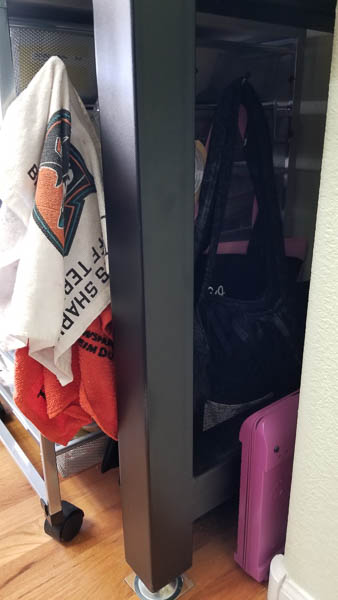
This is a slide-on hook rack on the far other side of the elfa carts. Here I keep a couple of old hand towels and my tote bags.
Shelving
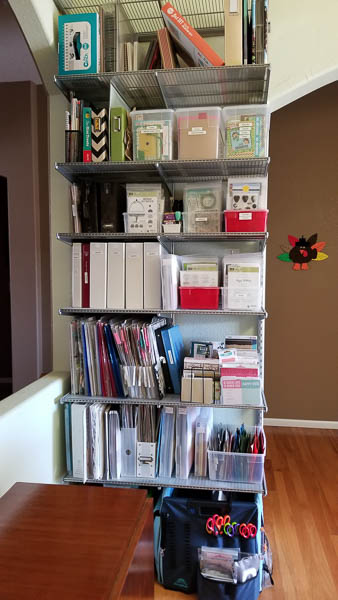
This is my one set of shelves I can squeeze into the room! At the bottom is my crop tote — always packed with projects and tools. The bottom shelf is:
- Albums in progress
- My memorabilia to scrap
- Specialty paper such as a container of travel stuff and a container of stuff for my nephews
- A plastic bin of scrap paper
The next shelf up contains:
- Collections
- My die and stamp catalogs
- 6×6 paper pads standing upright in two old black wire letter holders, remember those? I snagged them for free when the office I worked in virtualized and they sent us all to work at home.
The next two shelves up — the two within eyesight and easy reach — hold my stamps. Plastic shoeboxes hold acrylic sets in 6×8 ziplock bags, with magnetic sheets behind the stamps for the coordinating dies. The binders on the left hold unmounted rubber stamps on glossy, thick dividers.
The next shelf up holds some inspirational books and magazines, a couple of mini albums I need to do, and taller plastic shoeboxes that hold finished cards. I’ve organized them by themes that make sense to me so it’s super easy to pull a box down and pull out the cards I need for the next month’s birthdays. (Yes, I pull, sign, address and seal up the whole month’s birthday cards at once, then put them in the mail as each birthday gets closer. Much more efficient than doing one card at a time at the last minute!)
Lastly, the second-to-highest shelf holds stuff that I rarely need to access, such as my Cinch, extra Cinch coils and chipboard, and extra albums. Nothing’s on the top shelf because it’s too darn high to reach!
Stamps
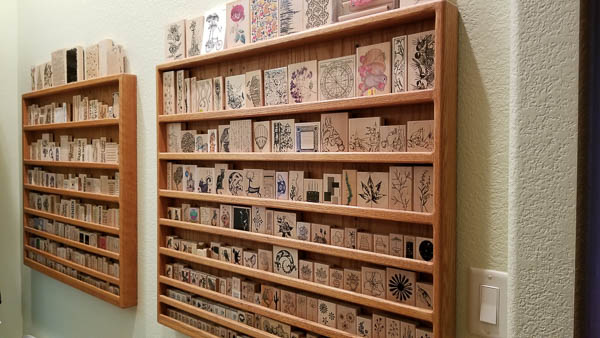
The last category of stamps, wood-mounted rubber stamps, are stored in the butler-way next to the scrap room. This is a super small corridor that connects the kitchen to the dining room. Well, it’s mine now! I bought these two handmade stamp shelving units from a gentleman who made them for his wife who passed away. They fit this space perfectly and I love how the shelves accommodate every possible size of stamp. And yes, they’re busting at the seams!
Die Cutting
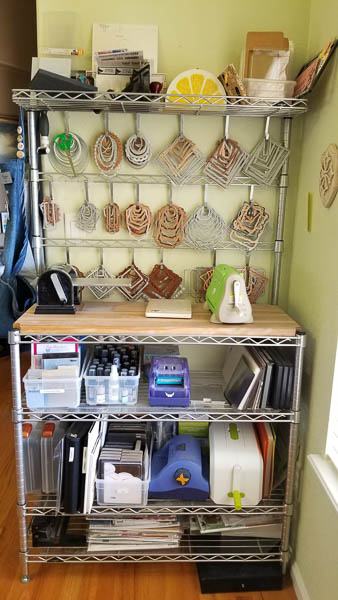
Back in the scrap room, opposite the shelving unit is my die cutting station. This is a baker’s rack from The Container Store. It’s the perfect height to stand at to die cut. I have my two favorite machines on the butcher block counter with hooks to hold those open, nesting die sets that I use the most. Above that is my mail station; address labels, stamps and other fun mailing goodies are up there.
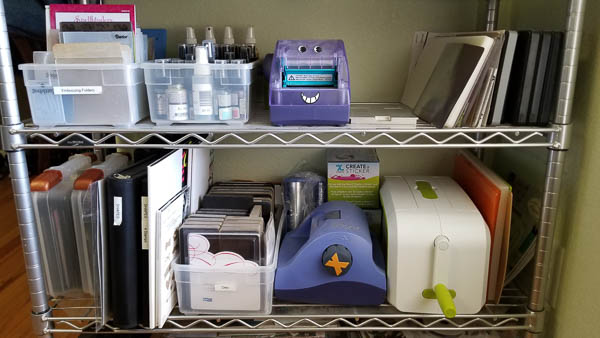
Here’s a closeup of the shelves, which house embossing folders, spray mists, Xyron machines, extra cutting pads and long dies, ArtBins of smaller dies, another plastic shoebox of those thick Sizzix dies, and a huge die cutting machine. So, all my dies and embossing folders are right below the station at which I’d use them. The sprays are perfect here because I put that cardboard box on the floor right near here to mist in.
The lowest, super shallow shelf in the first photo holds card kits I have yet to do. I save those for when I’m going away to crops or retreats since they’re self-contained and easy to grab.
Paper
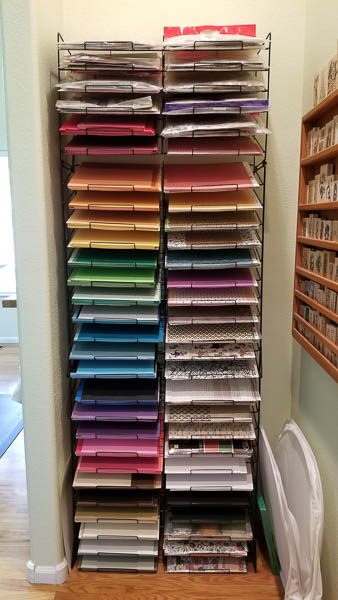
Last but not least, you were probably wondering where the heck my paper is! Well, in the butler-way, naturally! This was another gem of a find: two tall black paper tray racks from when Archiver’s went out of business (pause for a moment of silence.) I snagged those so fast, and they stack beautifully. Solid cardstock is on the left, coordinating loose patterned paper is on the right, and layout kits (collections) are in baggies at the top.
Well, I hope my space has inspired you to get organized and come up with some creative ways to make your space easier to get around and your supplies much faster and easier to pull out, use and store!

